Setting up Syncthing as an Alternative to Dropbox, Google Drive, etc.
Published
If you’re trying to reduce your dependence on third-party cloud services by taking the self-hosted route, you may be interested in using Syncthing to perform file-syncing across devices. It’s completely free and open source, and can be configured to rely on 0 external services.

I’ve been using Syncthing since early 2021 to sync notes and Excel files between 2 computes and an Android mobile phone. While it requires slightly more effort than the large cloud provider’s apps (e.g. I launch the app manually on my Android to save battery life), I’ve been very impressed.
Configuring / Installing
After install, Syncthing does not run automatically out of the box, and additional steps are required to configure it as a System Service. The Syncthing documentation provides examples describing how this can be accomplished. I personally used NSSM to install Syncthing as a service on 2 Windows PCs. See the “Security Tips” section below for advice on how to run Syncthing as a non-admin user.
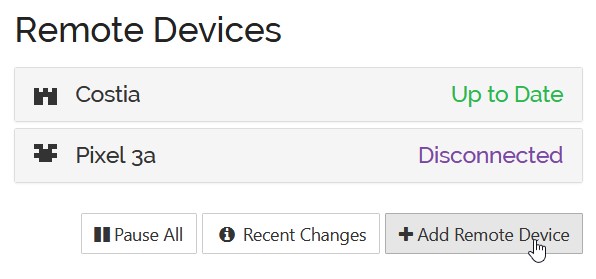
Once installed, I opened up the local Syncthing UI available at http://127.0.0.1:8384/ and added my other Remote Devices.
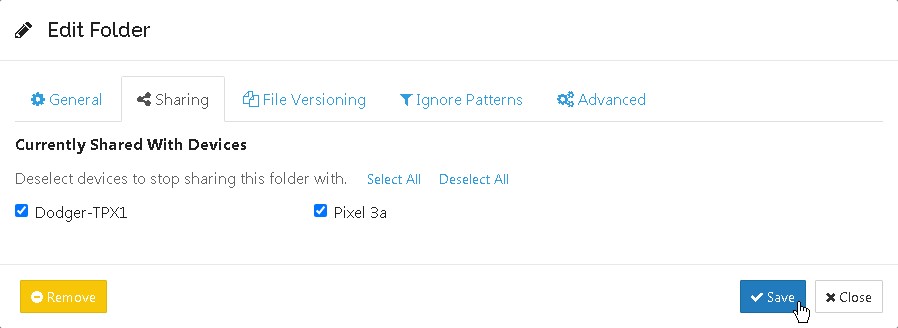
Once my 3 devices were configured and talking to each other, I used the “Add Folder” button to create a shared folder. I created the folder on my desktop/most stable machine, and made sure the share it with my other 2 devices via the “Sharing” tab.
Removing Dependencies on External Services
Out of box, Syncthing uses a few external services to improve connectivity between devices. Both services discussed below are optional and maintained by the Syncthing community. Disabling them requires a static-ish IP address and configuration of firewall pass-through / port-forwarding (or direct access to the Internet).
Global Discovery
Syncthing does a great job of making itself discoverable with the help of the Global Discovery service. Since my IP addresses are static, I chose to disable the service for 2 devices, and leave it enabled for my mobile phone.
To disable the service, I opened the Actions menu in the top right of the GUI and selected “Advanced”. In the pop-up, I scrolled into the “Options” section until I saw a checkbox for “Global Announce Enabled”, and unchecked that box.
At this point, I had to edit each of my devices and define specify the IP address and port where each could be found.
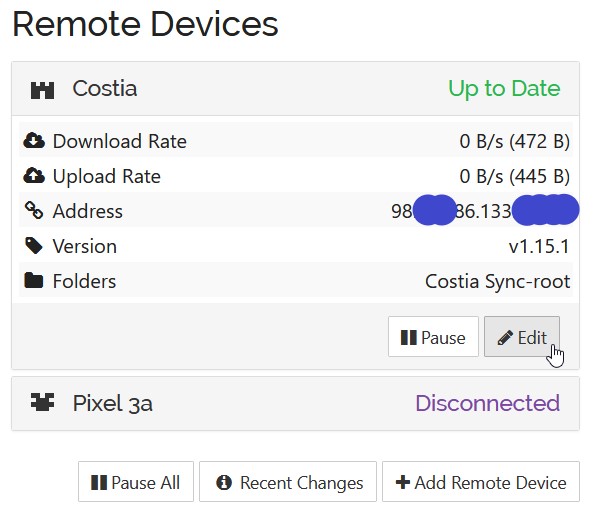
When editing the device, on the “Advanced” tab, set this information in the “Address” field in a format like: tcp://96.15.27.131:22000. This had to be done for each Remove Device, on each device (6 times total in my case)!
Relay Service
Syncthing employs relays to sync between devices that cannot make a direct connections to each other (e.g. if there is a firewall between them). Relay servers are maintained by the Syncthing community. This is an optional service, and not necessary if your Syncthing instance is directly accessible from the Internet.
To disable the Relay Service, open the Actions menu in the top right of the GUI and select “Advanced”. In the pop-up, scroll into the “Options” section and uncheck the box label “Relays Enabled”.
Security Tips
As with hosting any Internet-exposed service, precautions must be taken to prevent attackers from gaining access.
Run Syncthing Service as a Non-Admin User
It’s recommended to run the Syncthing service as a non-admin user so that if the service is compromised, the attacker will gain limited access to the host server. On Windows, the service user can be configured either during Syncthing service install, or afterwards via the Services panel.

When creating the non-admin user, give it as little access as possible. It should only require read/write access to:
- The Syncthing executable directory
- The file folder locations that contain synced files
I also verified that the new user could not log into the server remotely via Remote Desktop. If running Linux or another operating system, I recommend taking comparable steps to ensure Synthing is not running as the root user.
Use a Non-Standard Port for Syncthing Data Connections
Security through obscurity can add an additional layer of protection to web services. This can be accomplished by adjusting Syncthing to use a non-standard port when listening for connections (the default port is 22000). This can be configured by either:
- Adjusting the “Listen Addresses” in the Syncthing GUI > Actions pop-up configuration menu
- Configure your firewall/port-forwarding to listen for a non-standard port externally (e.g.
20456), and forward the traffic internally to the Syncthing host machine on port22000.
If you’re not relying on Global Discovery, make sure to update the host’s Address on each device to take into account the non-standard port.
Comments
No responses yet