Quick and Easy Rabbit Fencing to Protect the Garden
Published
UPDATE May 2018: I strongly recommend using chicken wire, or a fence with smaller holes. The fence material shown here allowed rabbits to pass through until I added a layer of chicken wire.
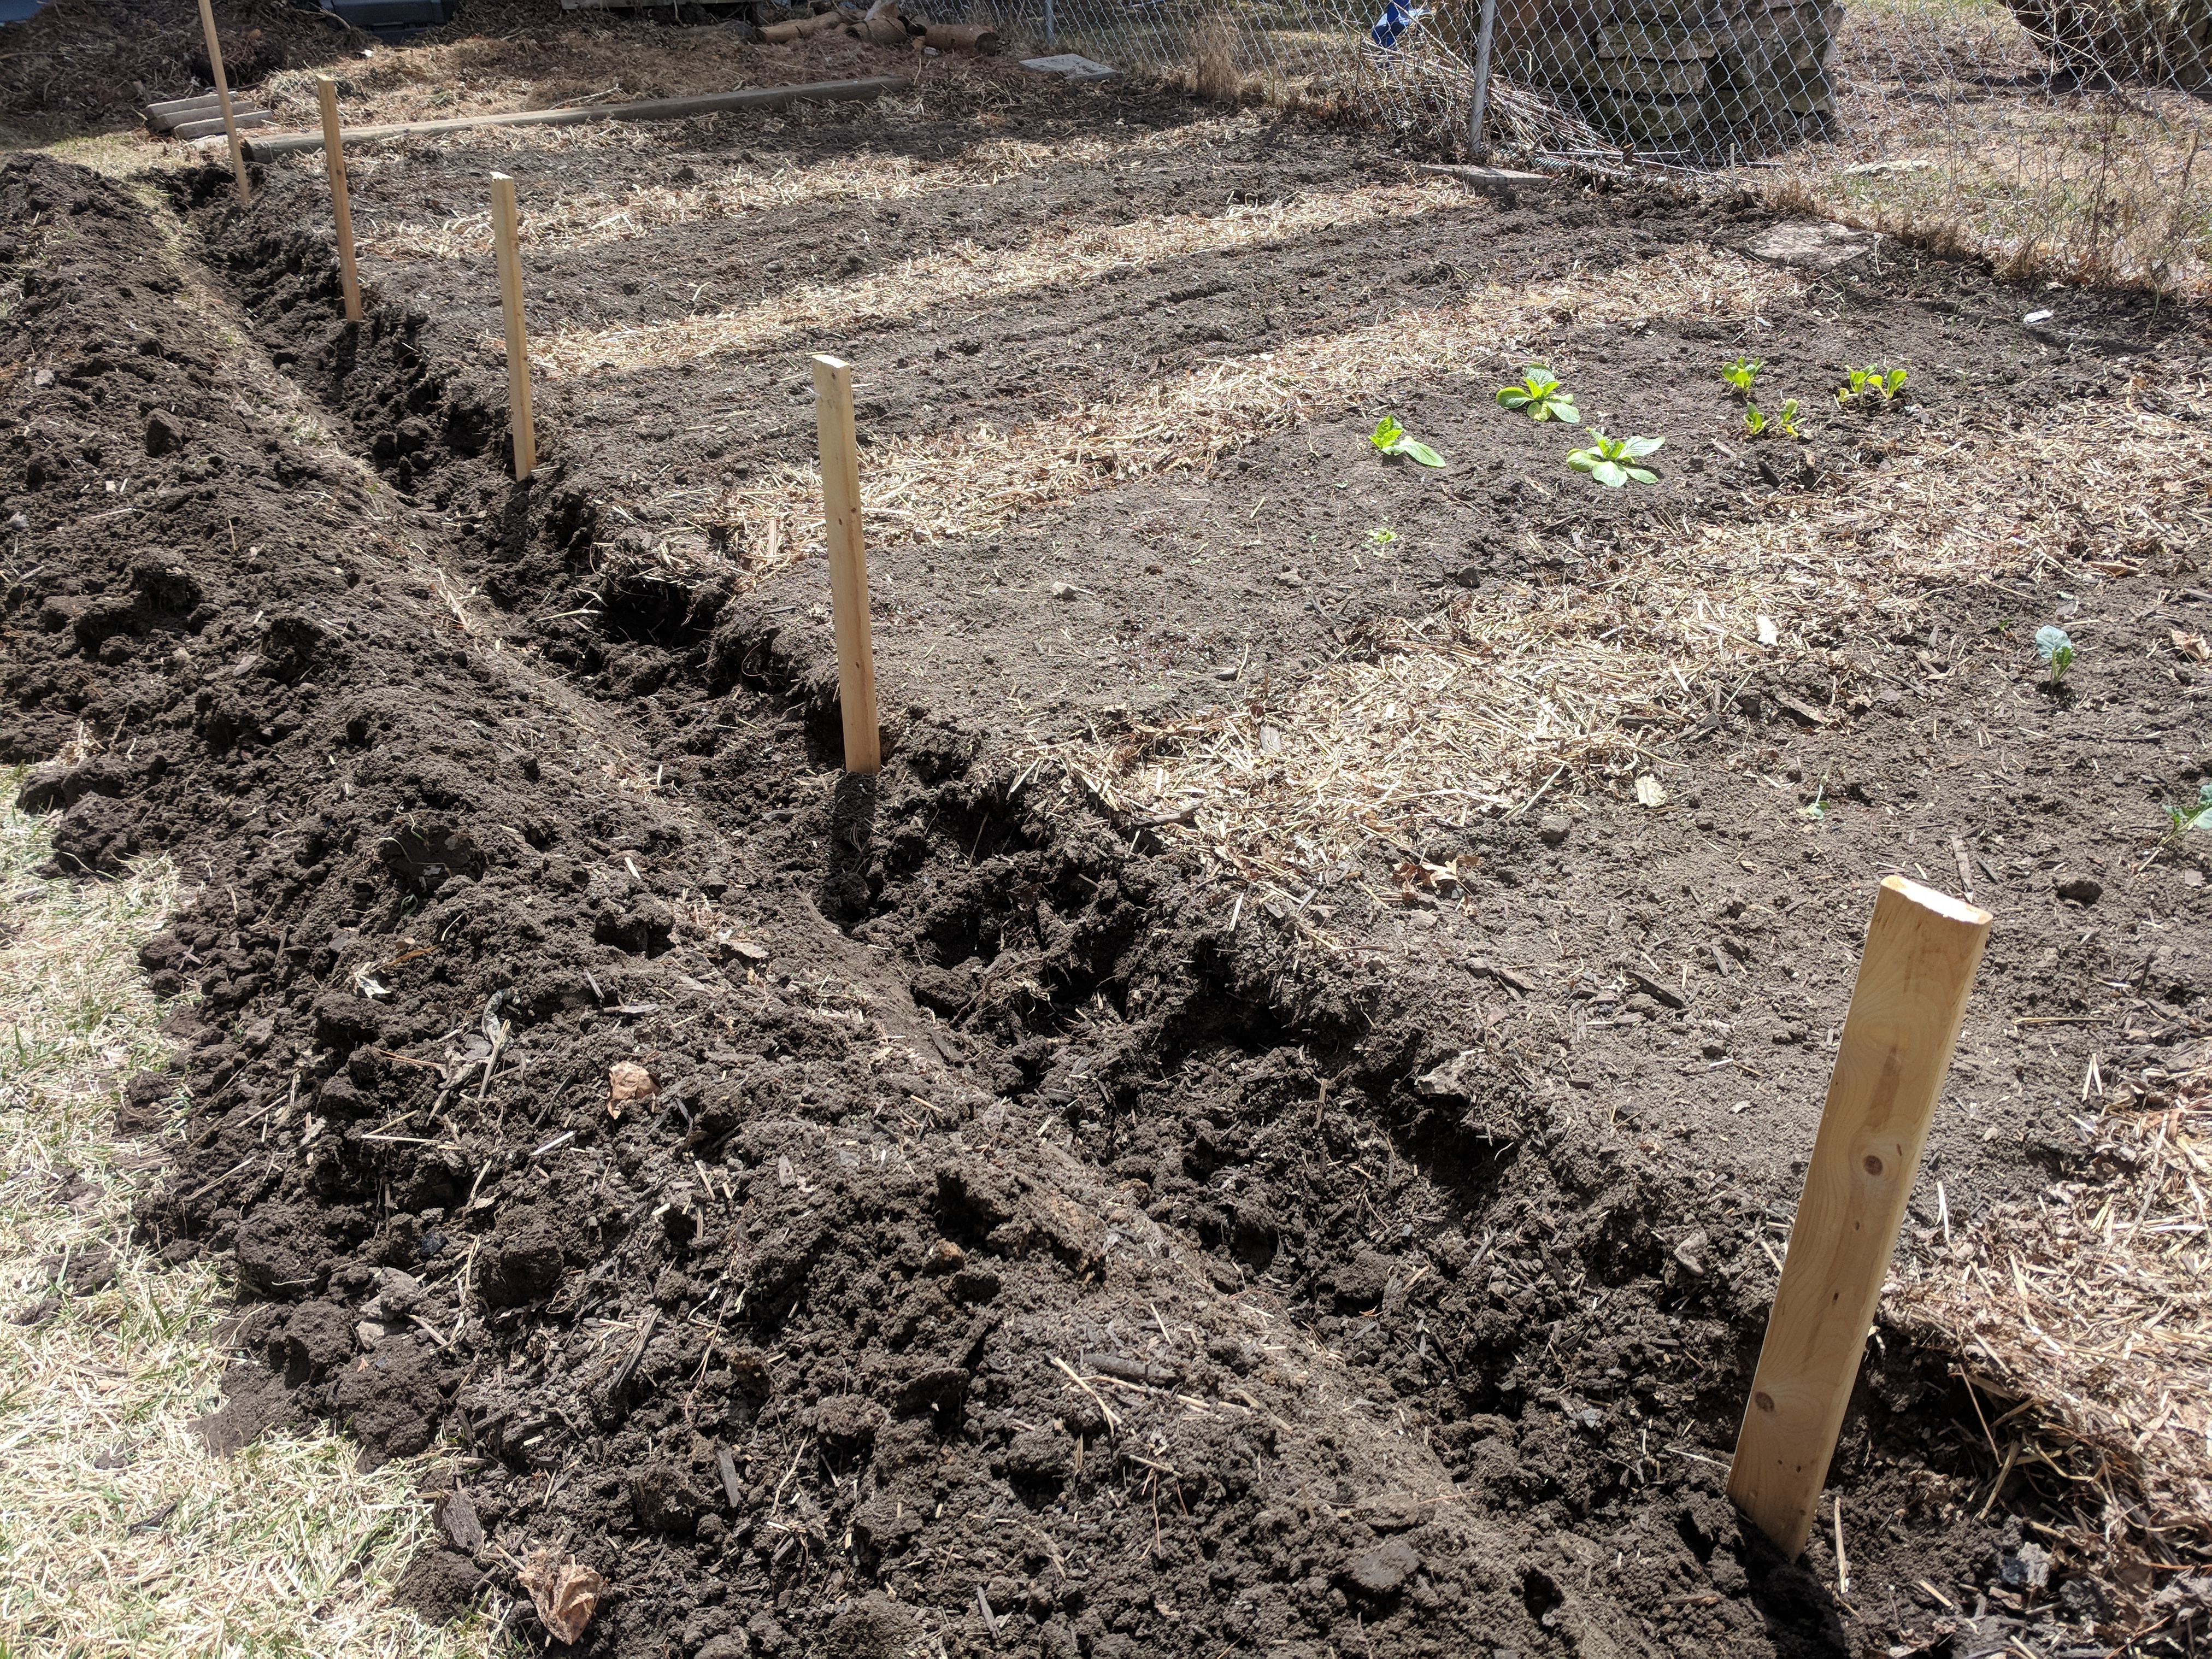
Once spring hit here in Wisconsin, we tilled the garden beds and transplanted our broccoli, cabbage, and leek seedlings into the ground. These were all hearty-ish plants that could handle the last frost. A week or so later, we awoke to find that a few critters had shown themselves into our garden, and been gnawing at our plants.

It was clear we needed to stand up a small fence to protect our garden from rabbits and the other hungry inhabitants of the area.
1. Gathering the Supplies / the Home Depot Run
Probably the most time consuming part of this entire process was figuring out where these supplies where in Home Depot.. I ended up using the following items to build our fence:
- Wired Fence – recommendations I saw were for a 2-3 ft high fence; After burying part of this 28″ tall fence, the result was a fence running about 2ft above ground. I did see several folks also recommended poultry wire (a.k.a. chicken wire), which was available for much cheaper. If I were to do this again, I would purchase fencing material with smaller holes – while this fence may be targeted at rabbits, the smaller holes might help dissuade squirrels and other pests as well.
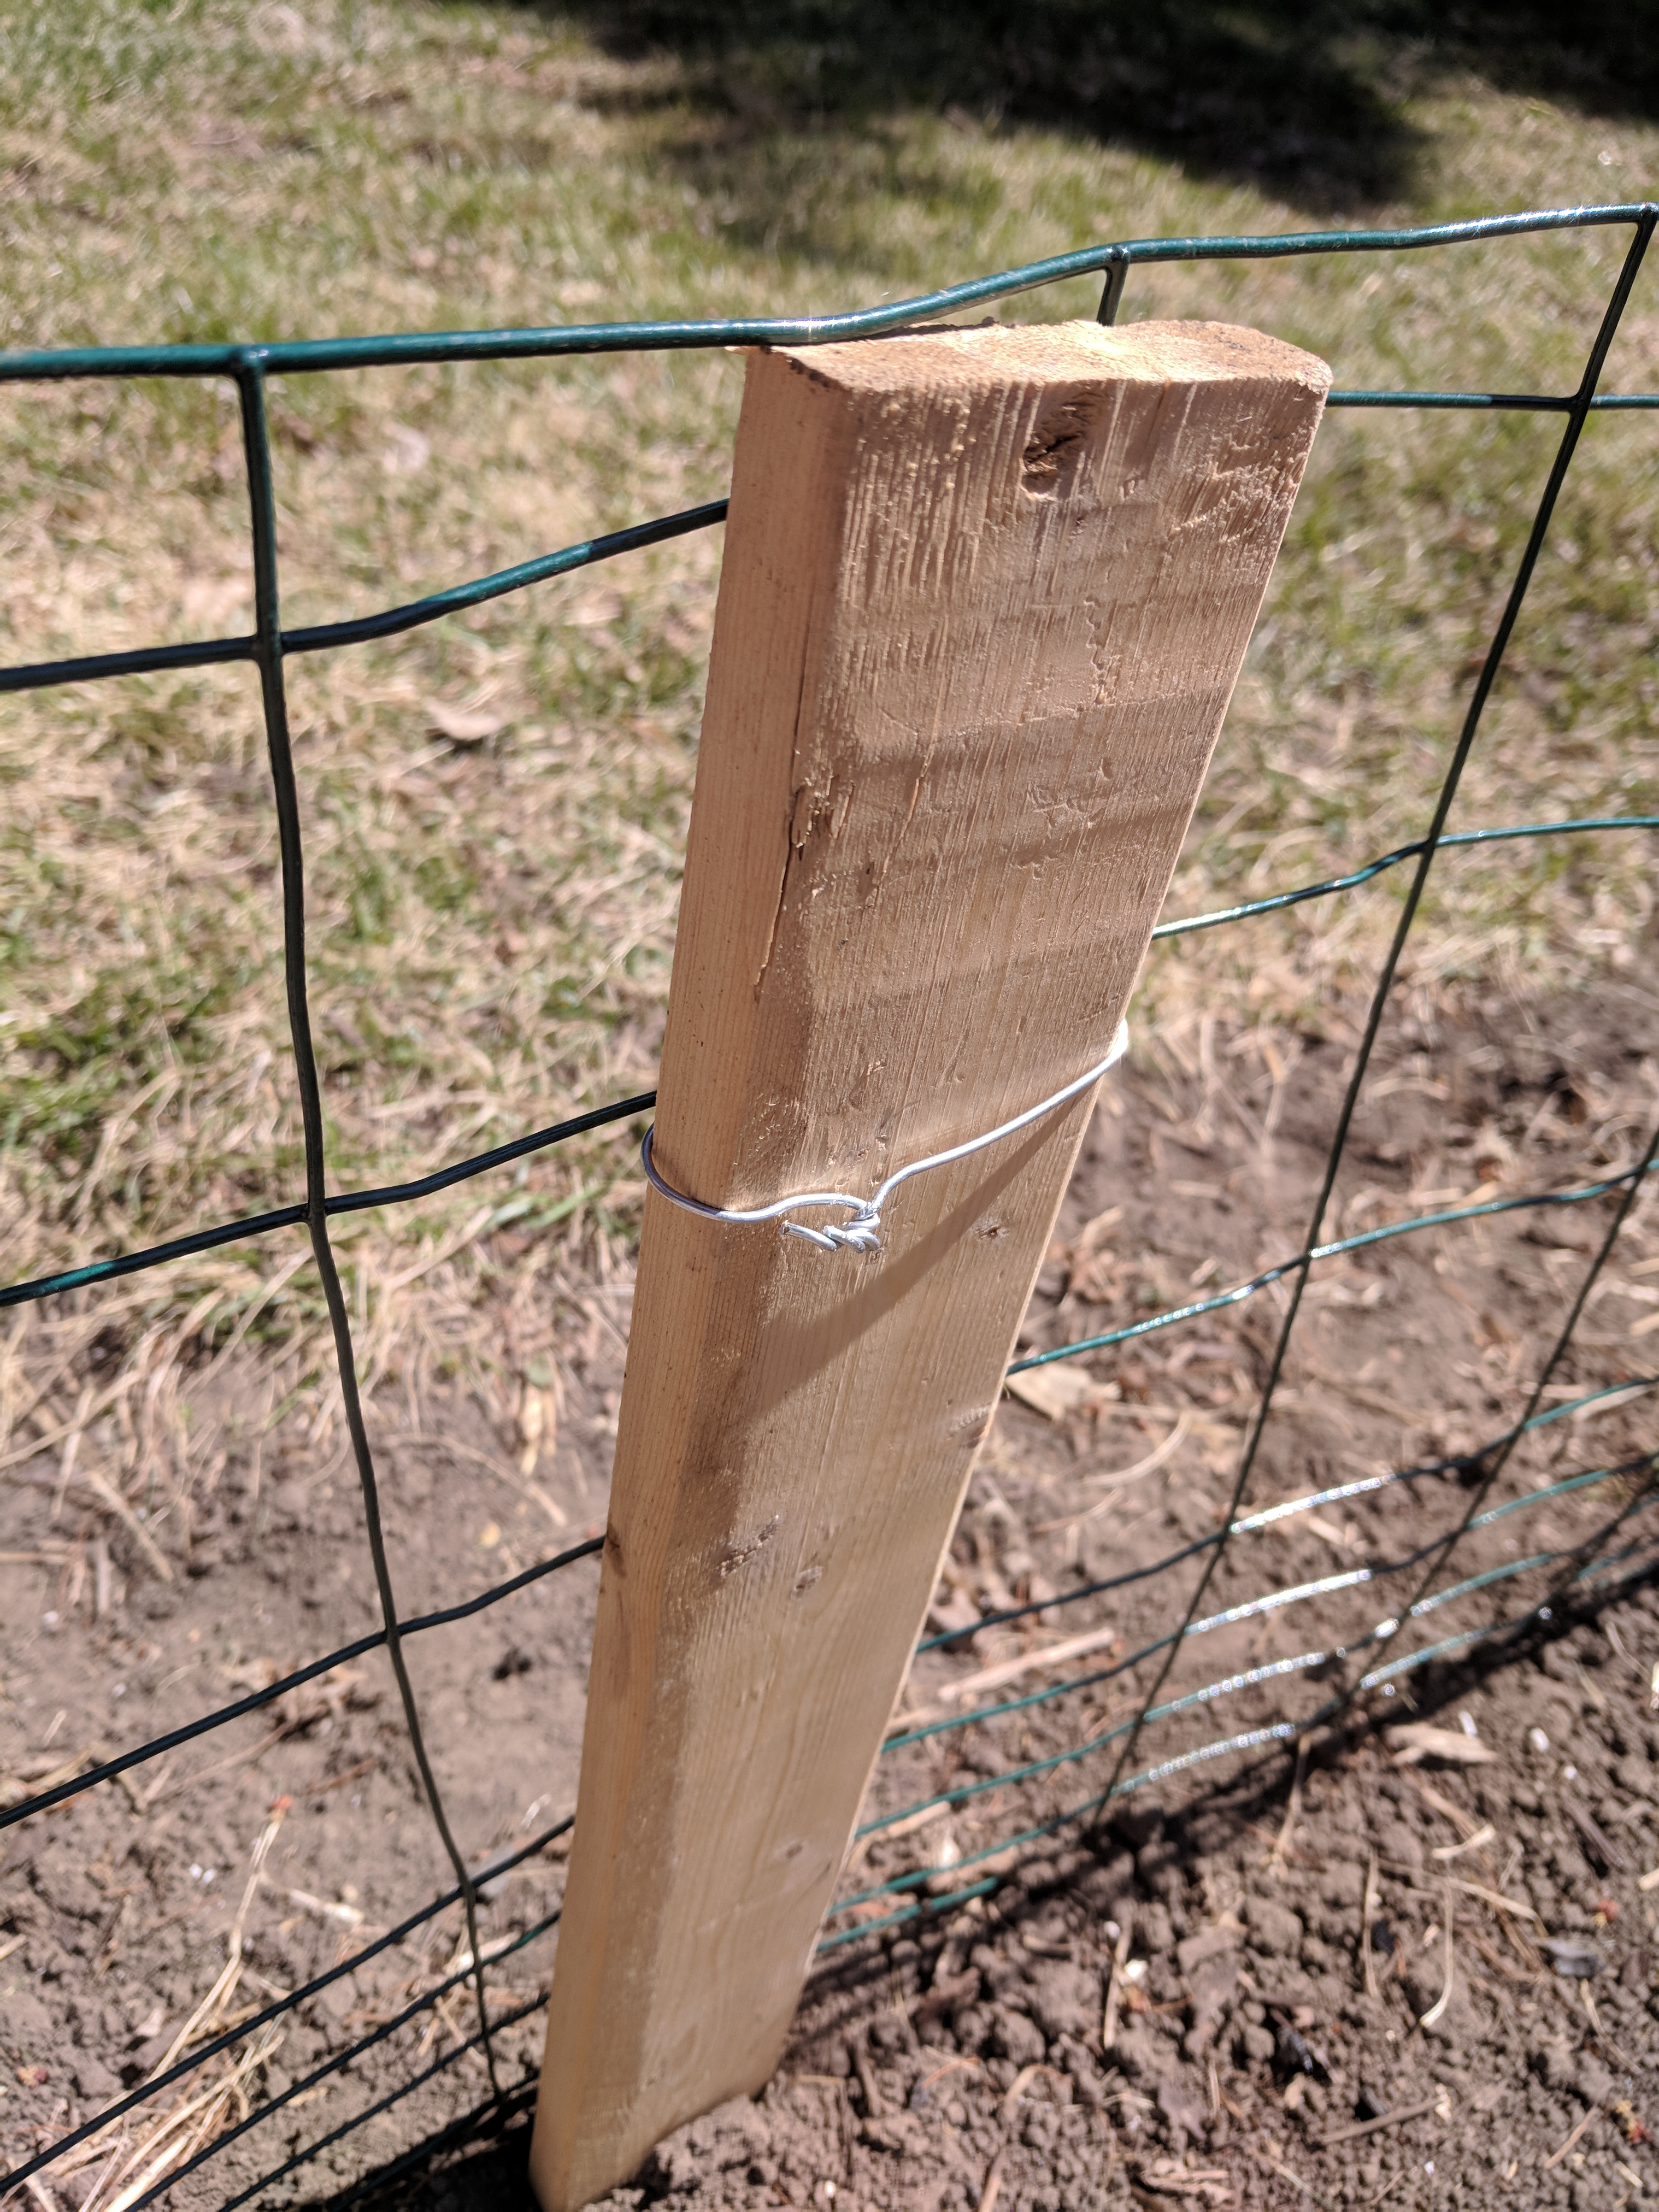
- Wooden Stakes – the Internet advised putting a support stake every 5-7 feet. I had some wooden slats laying around from an IKEA bed frame which worked just fine.
- Galvanized Wire – used to connect the fence material to the stakes.
- Shovel – used for digging the trenches.
- Wire Cutters or Pliers – used in cutting wire fence and wire attachments; also made bending the wire fence much easier.
- Hammer – used for driving the stakes into the ground; hitting with the side of the hammer head worked best.
2. Digging the Trenches
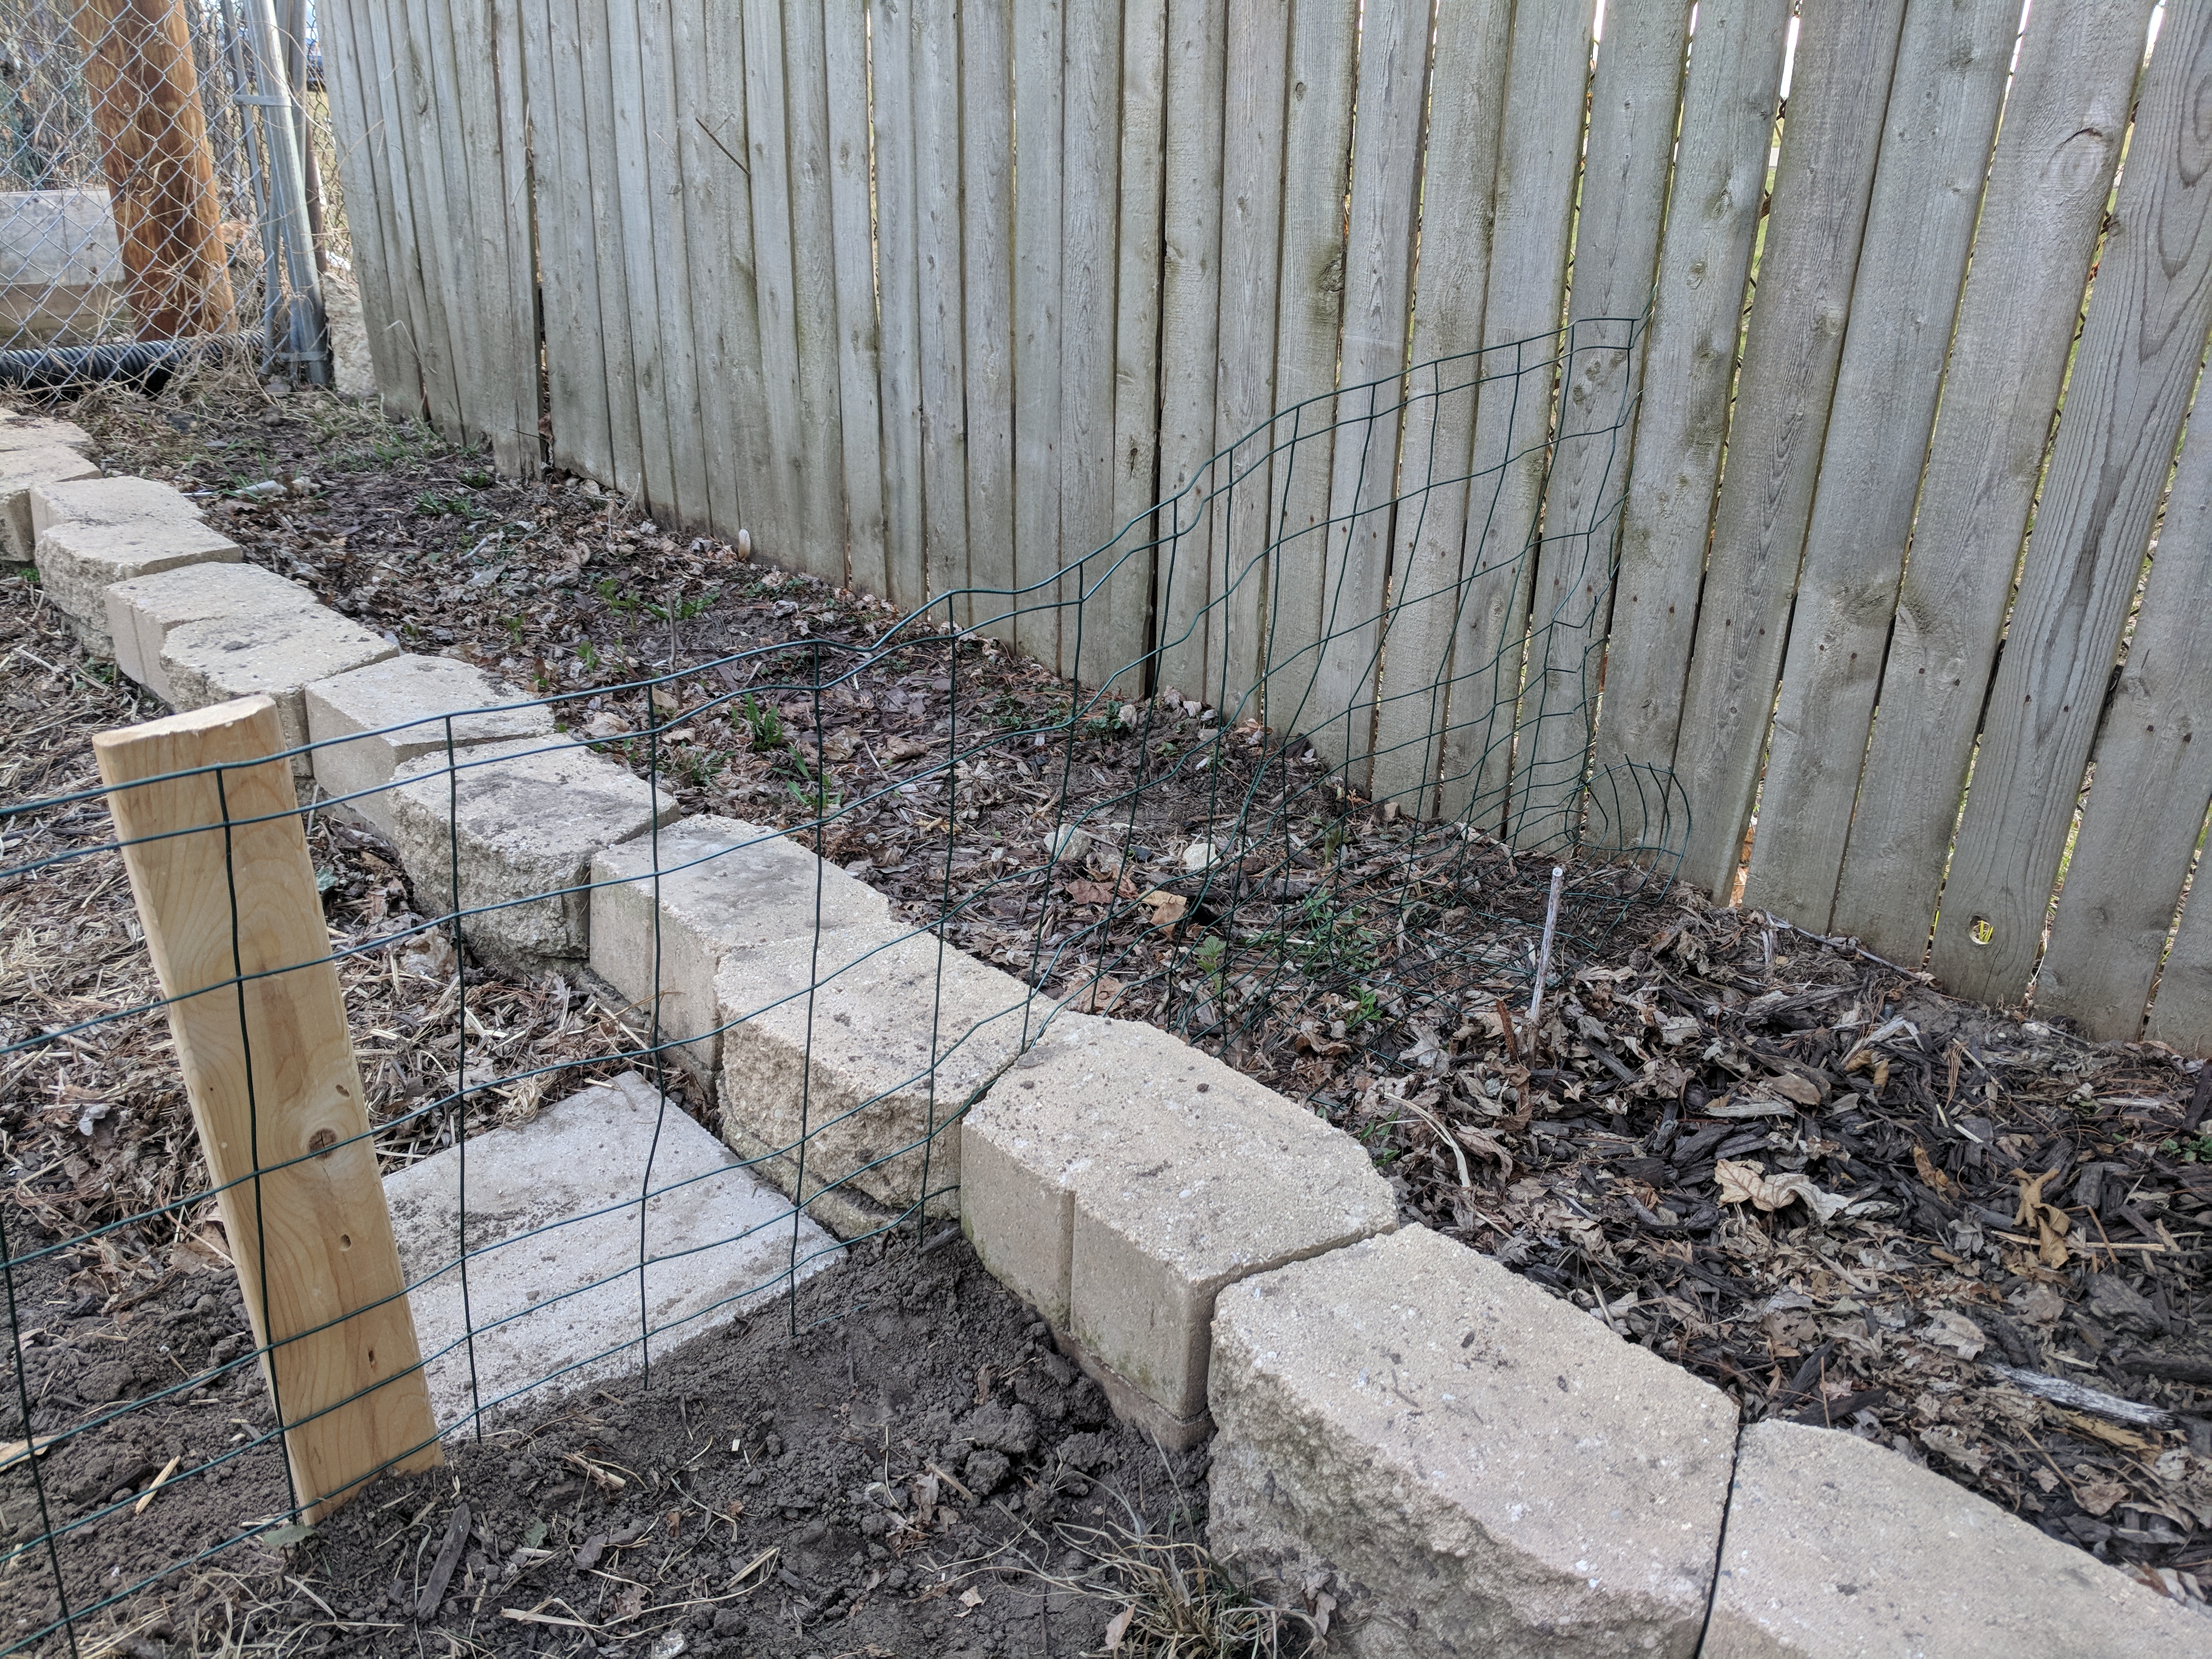
I started out by digging a 6-8 inch trench along the perimeter of the garden. Lucky for me, 2 sides of our garden were already fenced in (which meant way less ditch digging).
3. Standing Up the Fence
I placed a wooden stake about every 5 feet along the trenches. I used the side of my hammer head to drive the stakes into the ground just enough to hold while I worked in the fencing wire. At this point the stakes were pretty unstable, which was OK; they became much more stable later once I filled in the trenches with soil.
The next step was adding in the fencing wire; I buried about 5-6 inches of the fence underground by laying it in an “L” shape in the trench. It’s recommended to have the “L” section facing outward to make it more difficult for rodents to dig underneath. Here is a good YouTube video of folks using this technique in action.
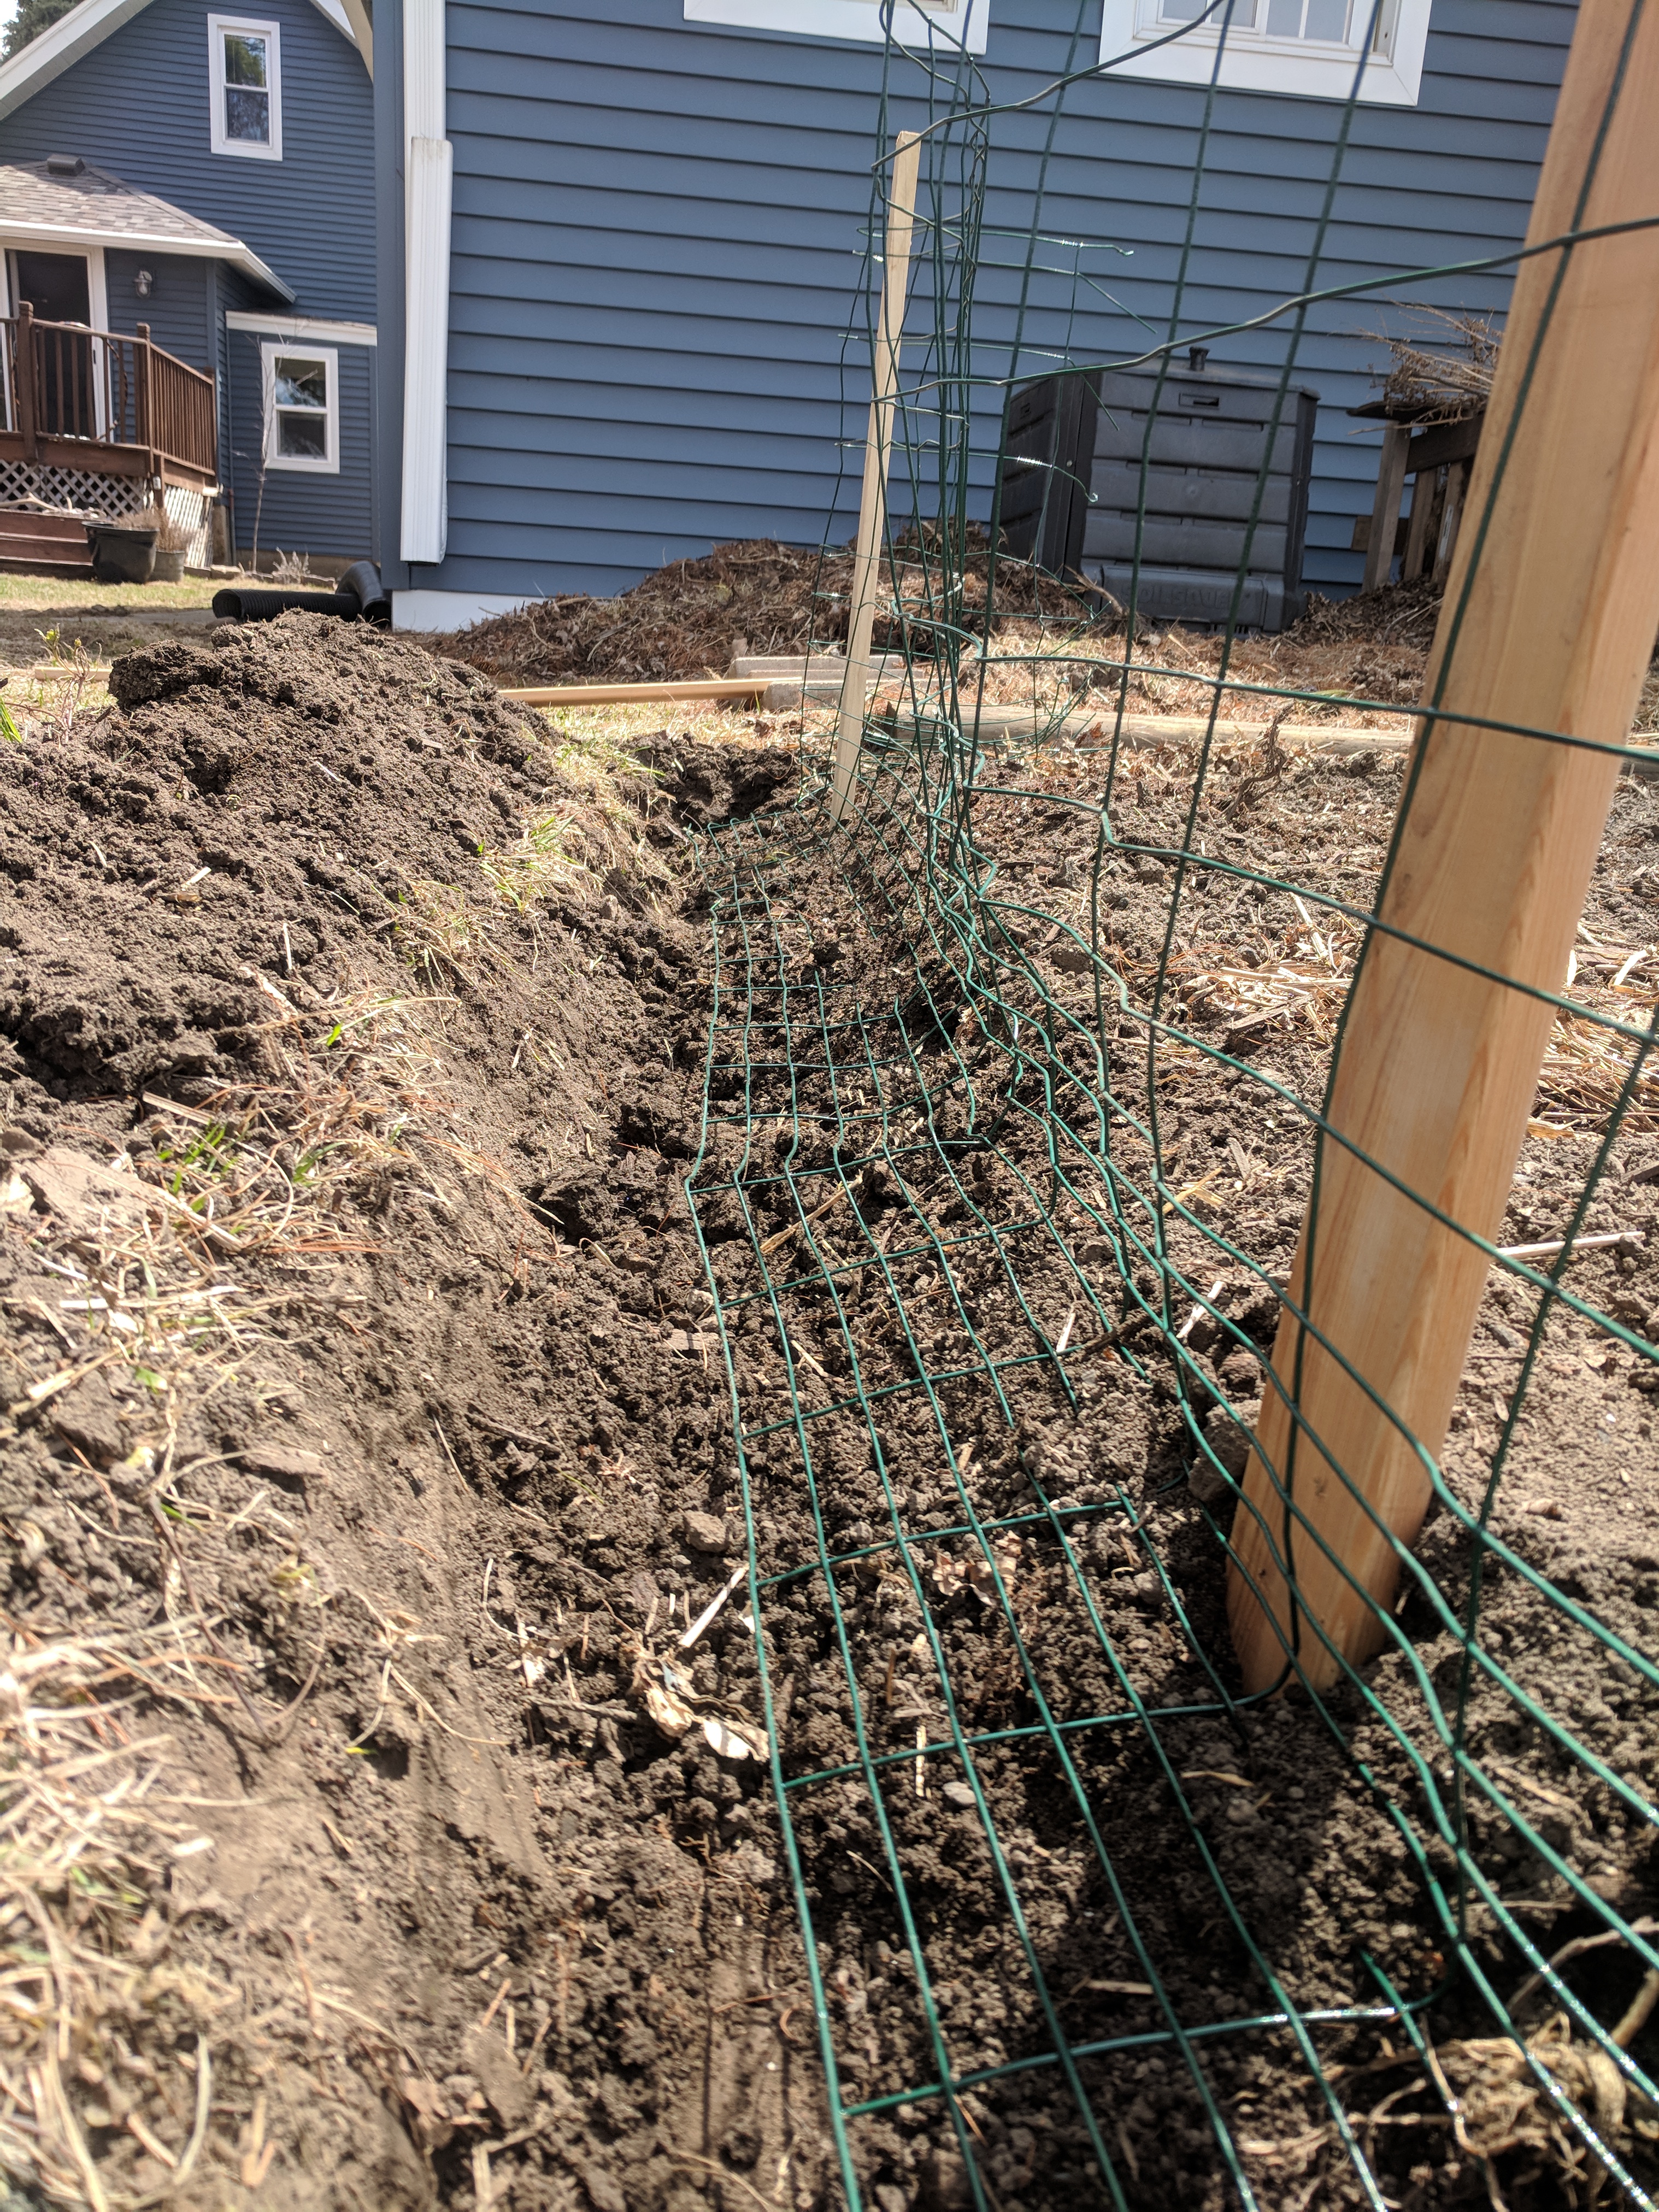
Next I began burying the fence, starting with the area around the posts. This helped introduce stability to the posts, and allowed me to test that fence itself was taught enough to keep critters out.
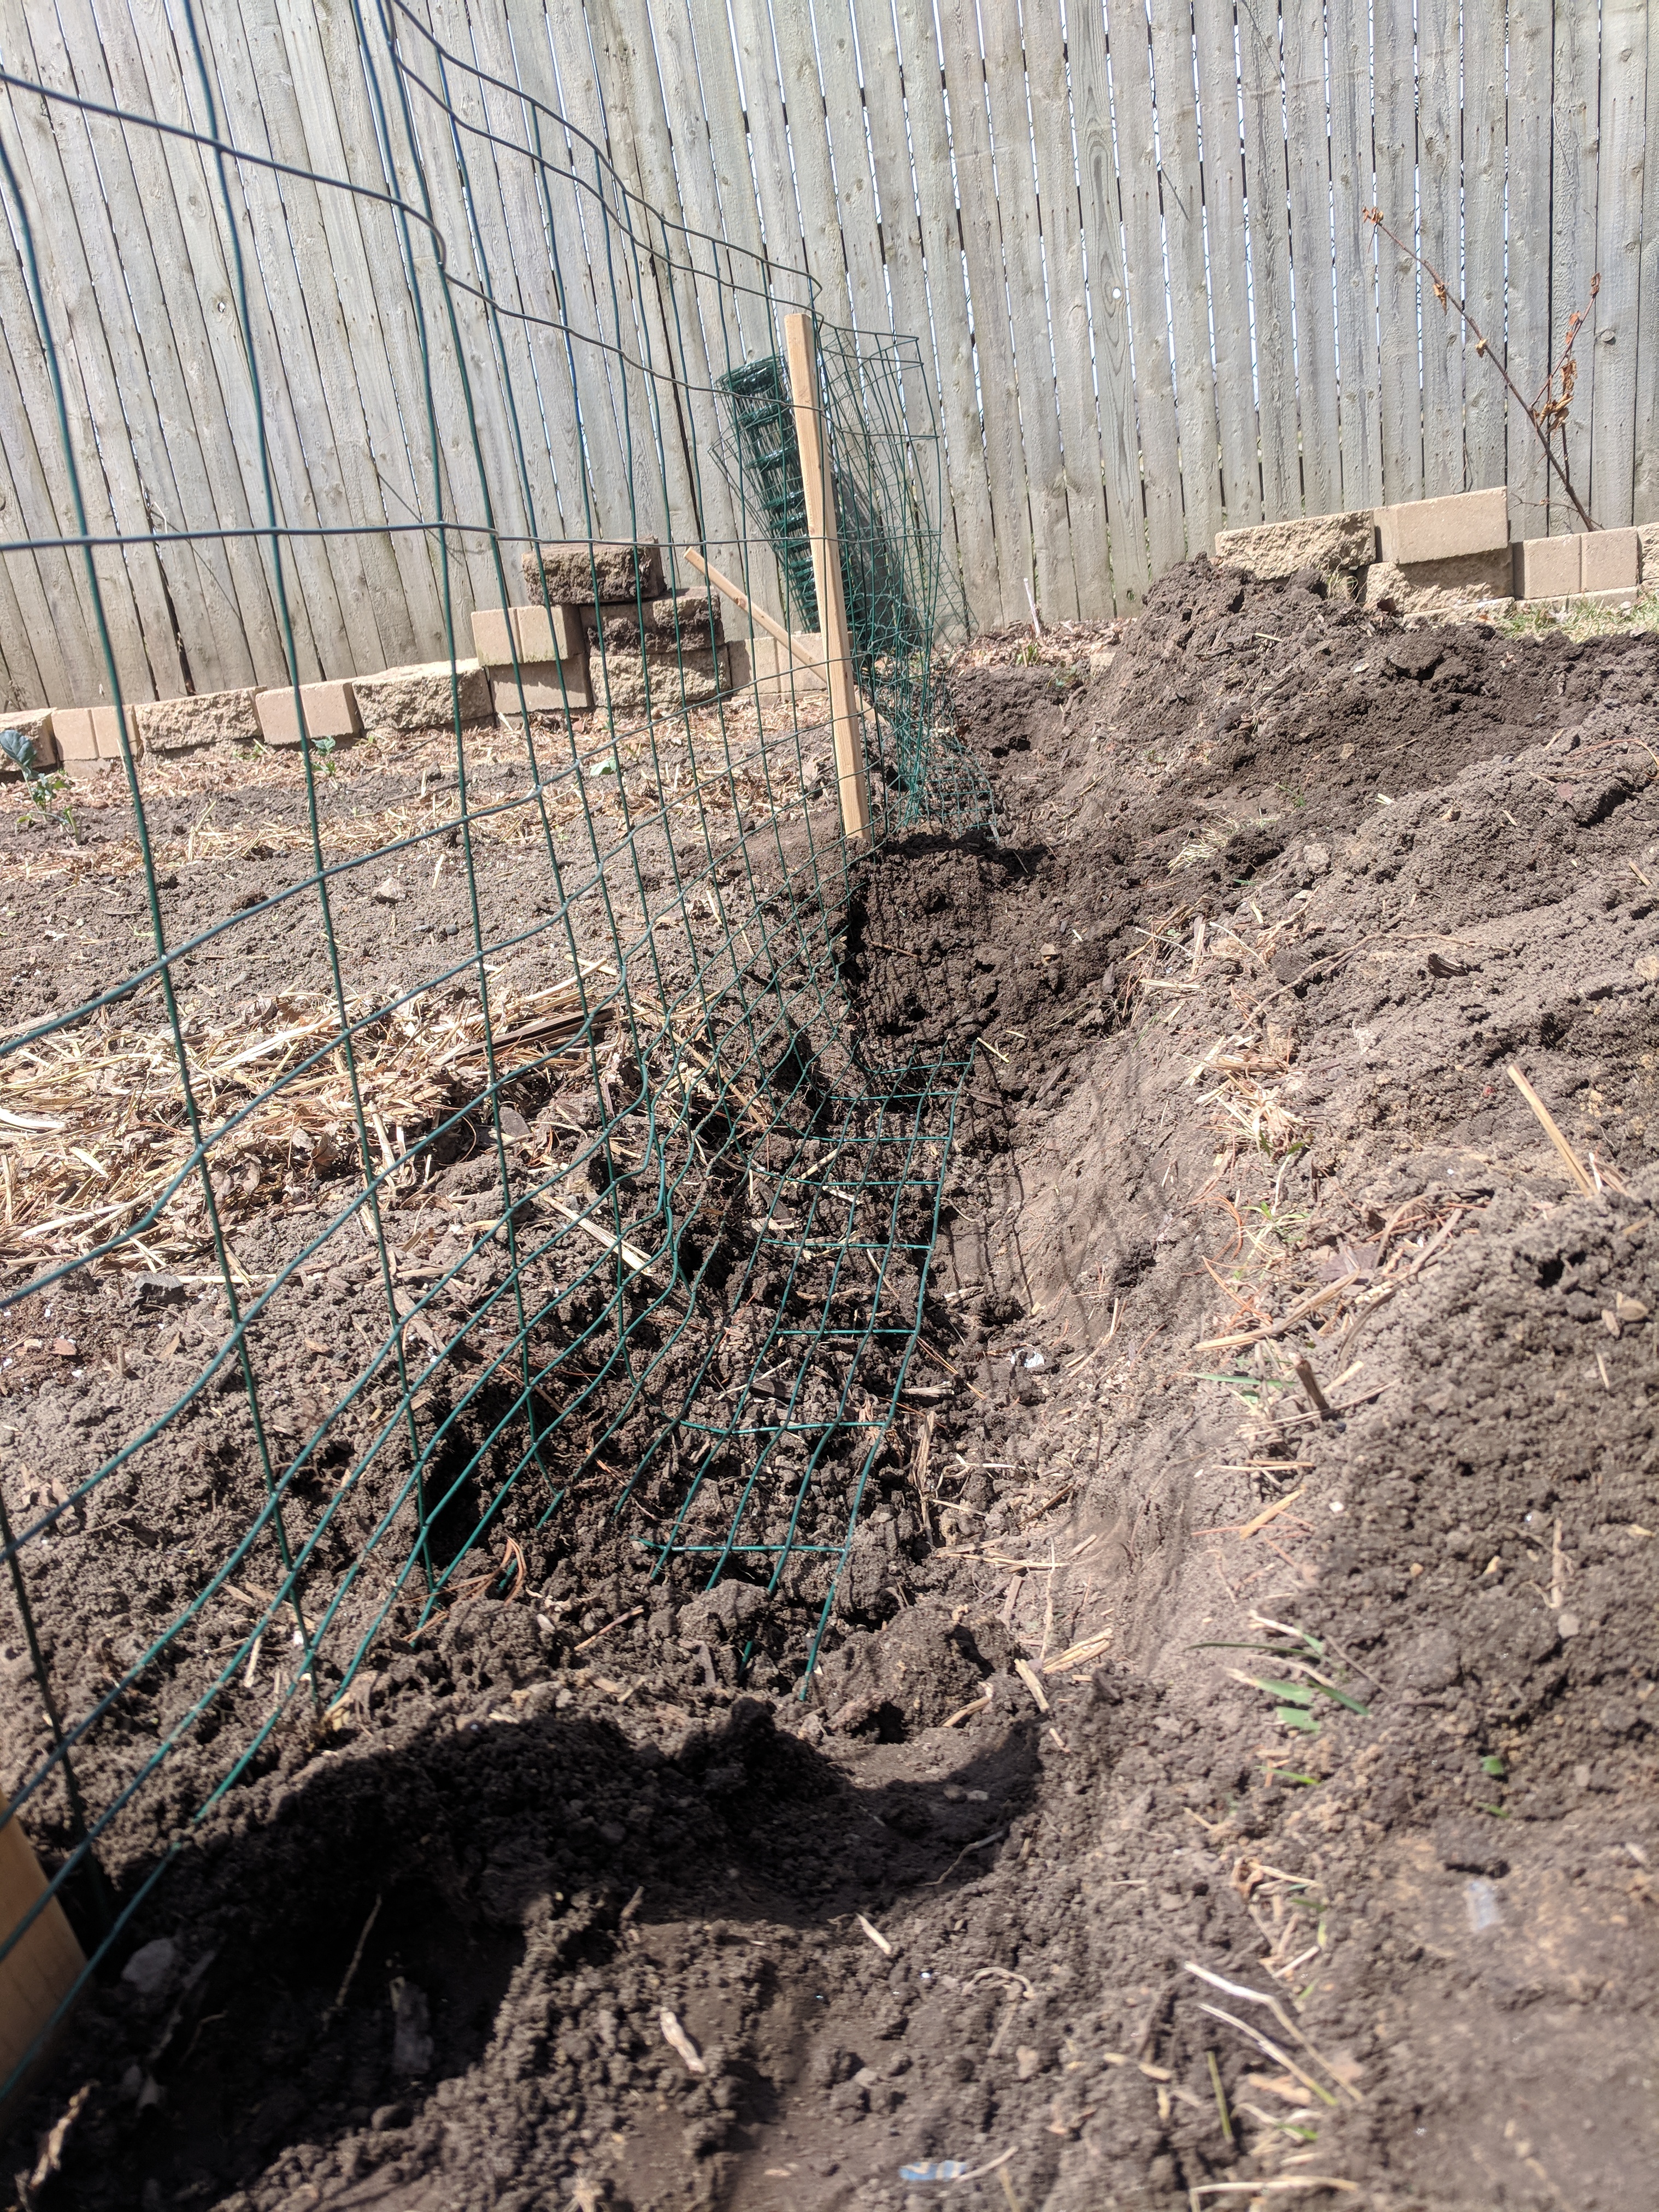
After checking the posts and fence wire, I eventually filled in the rest of the trench.
4. Attaching the Fence to the Posts
I used pieces of the galvanized wire to attach the wire fencing to the posts. Nothing special going on here, but I did use my pliers to bend and twist the galvanized wire to keep things nice and tight. As best I could, I also tried to angle the sharp wire edges down back into the post.
5. Oddities and Finishing the Job
I imagine the true judge of someone’s building prowess can be measured at the edges and intersections. The two ends of my fence ran into another existing bed, and then a chain link fence on the other side. Both of these scenarios required a bit of improvisation, including cutting the wired fence so that part was buried and part was not.
Wrapping Up
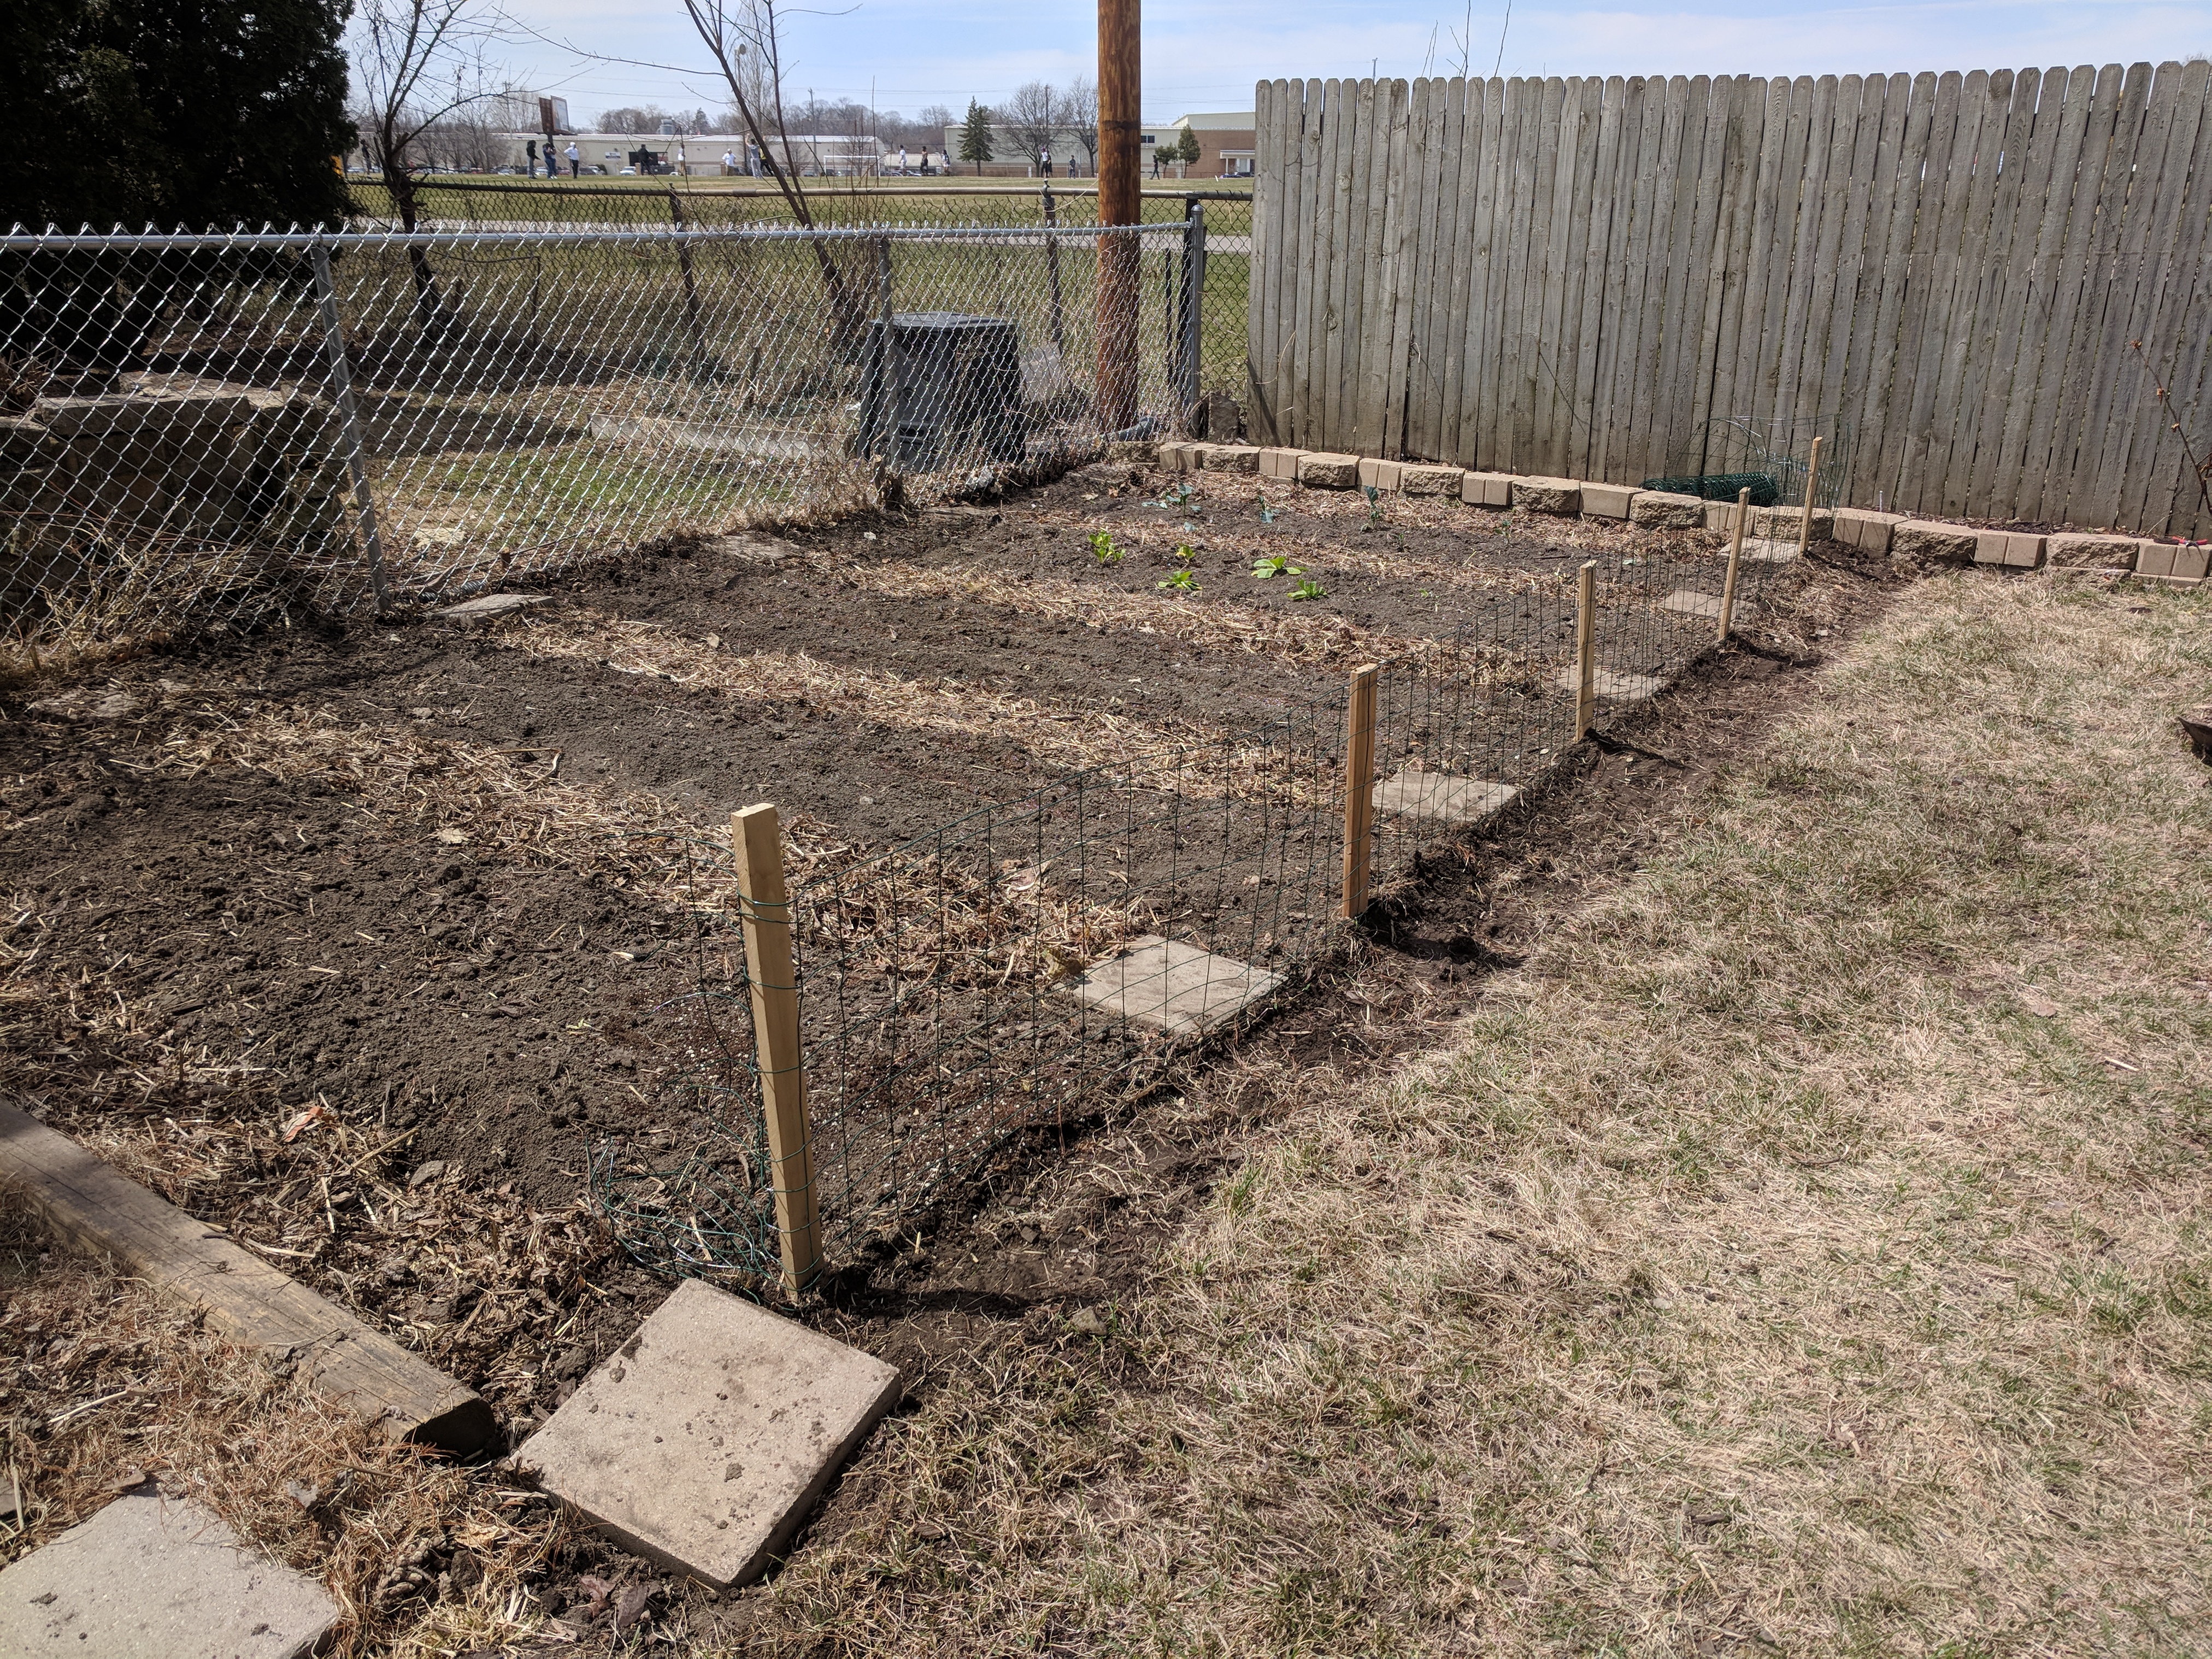
After about 4 hours of labor, I had stood up a 2 foot rabbit fence surrounding our garden. As advised by guides on the Internet, I dug a 6 inch trench around and buried part of the fence wire. This added serious stability to the fence, and prevented rabbits from digging underneath.
Time will tell if it keeps the pests out!

Comments
No responses yet