Installing Windows Server 2019 on a MacBook Pro
Published
A few years ago I inherited a MacBook Pro from early 2015 with plenty of potential (4-core i7, 16gb of RAM, 500gb SSD). I thought it would be fun to repurpose it as a home server, and use it as a streaming media server, file storage, and virtual machine host.

After becoming comfortable with Windows Server 2008 via free student access in college, I preferred to use Windows Server as my server OS whenever possible. Since it is not supported by Apple Bootcamp, the two main challenges I faced when trying to install Windows Server on a Mac were:
- Booting the MacBook using the USB Windows Installation Media – It turns out that Intel-based Macs boot using EFI 1, and a separate EFI partition is required on USB drives for Macs to boot form them. More details on this below.
- Installing Hardware Drivers that work on Windows Server – Apple published a robust suite of Bootcamp drivers supporting Windows 10, but these do not always apply for Windows Server. The steps I took to accomplish this are detailed below.
1. Booting the MacBook from a USB Windows Installer
The first step was finding a Windows Server 2019 ISO that I could use to create the USB Installation Media. I ended up downloading a free evaluation copy directly from Microsoft 2.
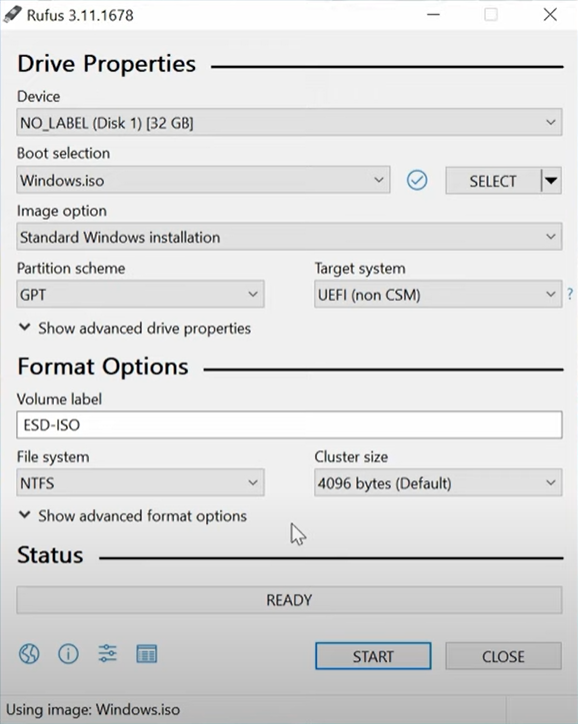
Once I had the ISO, I used the a free utility called Rufus to “burn” the ISO to my USB thumb-drive. The settings I used are below. Make sure to set the File System to “NTFS” – this will ensure that a separate EFI boot partition is created, which is required for the USB drive to be bootable by the Mac.
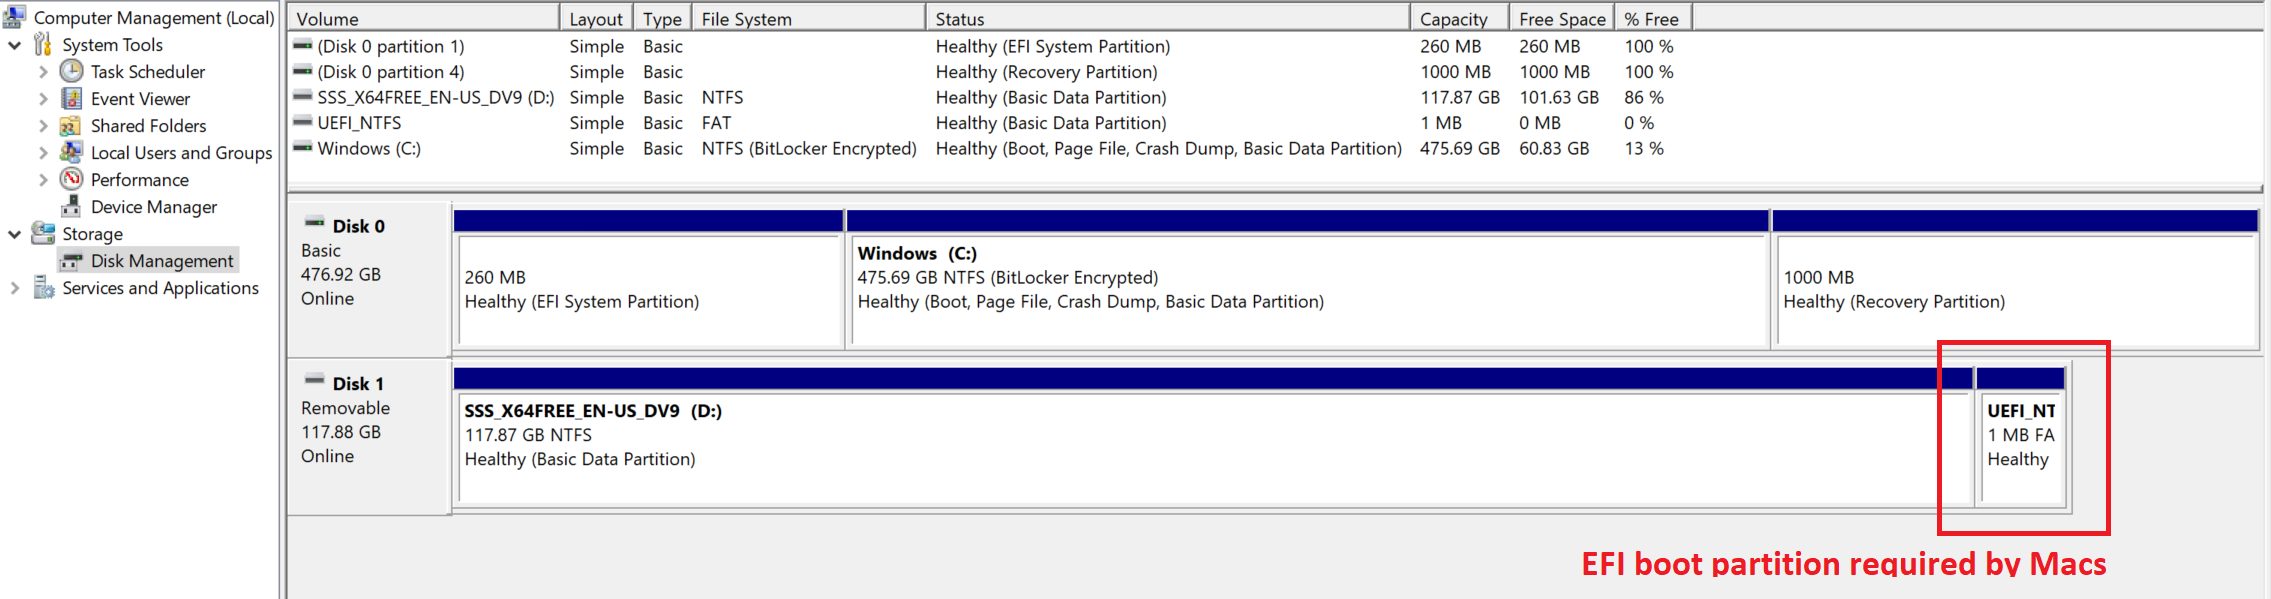
Once Rufus completed creating the USB boot media, I examined the USB drive partitions in the Windows Device Manager to confirm the partitions. Notice the 2nd EFI boot partition – this is required for the Mac to recognize the USB drive as bootable!
Once the USB drive was ready, it was as simple as inserting it into the MacBook, holding the Option key at boot, selecting the USB drive, and proceeding through the Windows Server installation.
2. Installing Device Drivers
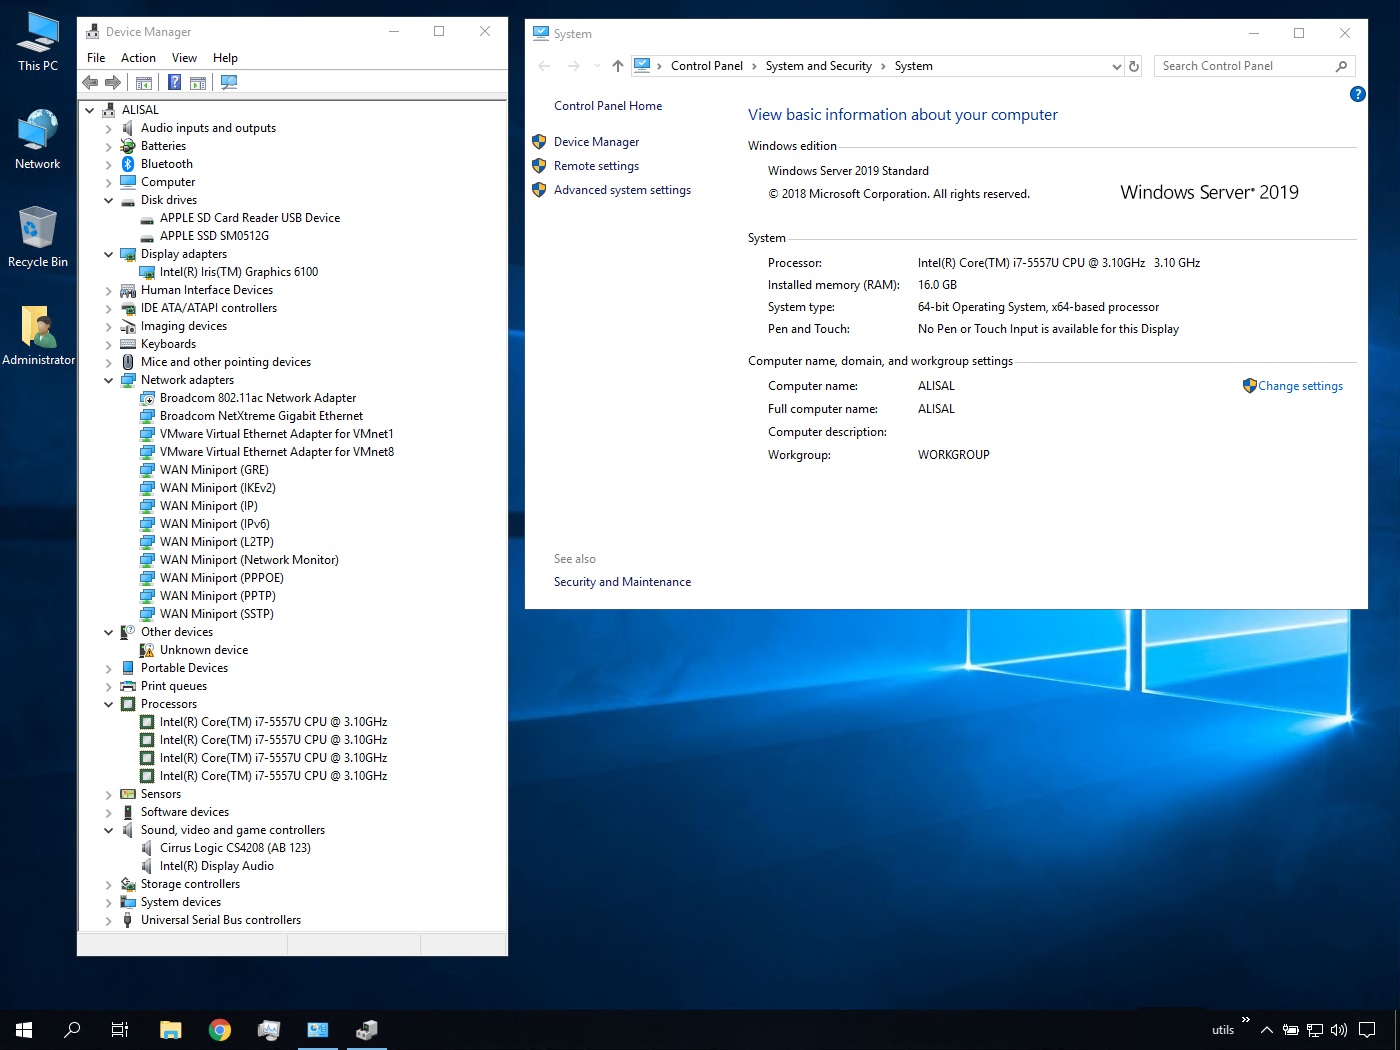
Once Windows Server was installed and booted, the next step was installing device drivers, and enabling things like networking, sound, and graphics. Unfortunately Windows Server builds are not known for their driver compatibility.
Enable Wifi Networking and Audio Services
Prior to attempting to install any drivers, I ensured that the Wireless LAN Service and Windows Audio Service were installed/started. Without these services enabled, the respective driver installs may fail.
- Wireless LAN Service – reference link – can be started by running
Add-WindowsFeature -Name Wireless-Networkingin Powershell. - Windows Audio Service – reference link – can be started in the Windows Services manager.
Install Apple Bootcamp Drivers
The Apple Bootcamp drivers make a great place to start. Here is a link to the Apple Bootcamp drivers 6.0.6171 (2016-04-01) for Windows 10 that I installed: http://swcdn.apple.com/content/downloads/16/10/031-55711/ufi4c7o3x20i5ge93l2yu869yegn222i8l/AppleBcUpdate.exe
Last Resort: Export Windows 10 Drivers
If you’re unlucky like me, critical drivers like the Wifi/Networking may still not be found. As a last resort, I installed a copy of Windows 10 on the MacBook Pro, exported the drivers, and manually installed them after re-installing Windows Server back on the MacBook. The process went something like this:
- Installed a copy of Windows 10 on the MacBook Pro (ISO available from Microsoft) following the same steps above to create a bootable USB Windows Installer.
- Once Windows 10 was installed and booted, I installed the Apple Bootcamp drivers package above.
- After confirming devices were available in the Windows Device Manager, I exported all third-party drivers with a few commands in Powershell.
- Installed Windows Server back on the MacBook.
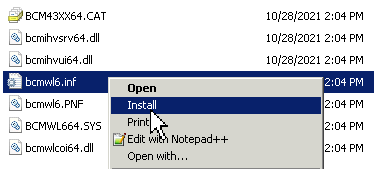
- Copied the exported drivers from step 3 back onto the MacBook; I navigated the file structure to find any missing device drivers and manually installed them by right clicking on the
.inffile.
Enjoy!
Hopefully at this point, all device drivers are installed and you’ve successfully got a copy of Windows Server running on your Mac. Thanks for checking out the article – hope it helped.
References
- Wikipedia: Apple-Intel Architecture, Booting
- Activating the Evaluation Copy requires setting the edition to “ServerStandard” prior to activation; make sure the “Windows License Manager Service” is running before executing these steps.
Comments
No responses yet